Visual Basic Serial Port Programming

Posted on  by

I know this has been done in the past a few times so here's one more. This is a skeletal Visual Basic 2010 and Arduino Sketch that I mixed together to test the PC to Arduino Uno connection via serial. It simply turns LED 13 on or off.
The Visual Basic 2010 code assumes you have Form1 with 2 buttons Button1 and Button2 and SerialPort1 controls. Button1 sends a 1 and Button2 sends a 0 to the serial port COM10 (change this to match your PC to Arduino port setting)
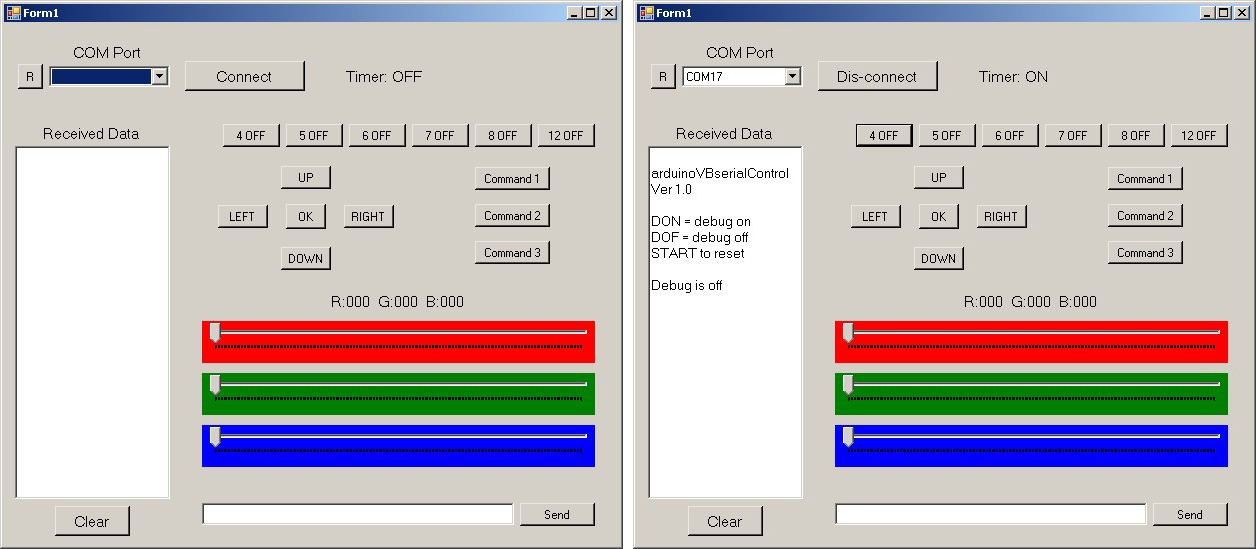
See attached photo of my simple form design.
The Arduino Uno Sketch code simply waits and reads the serial port. If it see 1 it will turn PIN 13 on and if it sees 0 it will turn PIN 13 off. If you have an LED on PIN 13, you can turn it on and off. On the Arduino Uno, PIN 13 is attached to a an on-board LED.
I used COM10 as a serial port but you can (and must) change it to match your Arduino serial port.
The purpose of this code is to simplify explanation of how to connect VB to Arduino. You can add error processing and more intelligence based on your particular needs.
Make sure you drag the Serial Port control icon from the Toolbox onto your form. It should have the name SerialPort1
WARNING: On my PC I had to close the Arduino IDE Serial Monitor window while runing the VB program, else I run into all sorts of error message about COM port access denied and the program will fail.
You can download Visual Basic Express 2010 for free from Microsoft
http://www.microsoft.com/visualstudio/en-us/products/2010-editions/visual-basic-express
'------------ START OF VB 2010 CODE -----------------
' NOTE: I am using COM10 so you need to change the Visual Basic code to match your COM port
Imports System.IO
Imports System.IO.Ports
Imports System.Threading
Public Class Form1
Shared _continue As Boolean
Shared _serialPort As SerialPort
Private Sub Form1_Load(ByVal sender As System.Object, ByVal e As System.EventArgs) Handles MyBase.Load
SerialPort1.Close()
SerialPort1.PortName = 'com10' 'change com port to match your Arduino port
SerialPort1.BaudRate = 9600
SerialPort1.DataBits = 8
SerialPort1.Parity = Parity.None
SerialPort1.StopBits = StopBits.One
SerialPort1.Handshake = Handshake.None
SerialPort1.Encoding = System.Text.Encoding.Default 'very important!
End Sub
Private Sub Button1_Click(ByVal sender As System.Object, ByVal e As System.EventArgs) Handles Button1.Click
SerialPort1.Open()
SerialPort1.Write('1')
SerialPort1.Close()
End Sub
Private Sub Button2_Click(ByVal sender As System.Object, ByVal e As System.EventArgs) Handles Button2.Click
SerialPort1.Open()
SerialPort1.Write('0')
SerialPort1.Close()
End Sub
End Class
'------------ END OF VB 2010 CODE -----------------
//------------- START OF ARDUINO SKETCH -----------------
//
// Mixed by: Hazim Bitar
// Based on: Science Guy 14 youTube tutorial http://youtu.be/g0pSfyXOXj8
int ledPin = 13; // the number of the LED pin
void setup() {
Serial.begin(9600); // set serial speed
pinMode(ledPin, OUTPUT); // set LED as output
digitalWrite(ledPin, LOW); //turn off LED
}
void loop(){
while (Serial.available() 0); // do nothing if nothing sent
int val = Serial.read() - '0'; // deduct ascii value of '0' to find numeric value of sent number
if (val 1) { // test for command 1 then turn on LED
Serial.println('LED on');
digitalWrite(ledPin, HIGH); // turn on LED
}
else if (val 0) // test for command 0 then turn off LED
{
Serial.println('LED OFF');
digitalWrite(ledPin, LOW); // turn off LED
}
else // if not one of above command, do nothing
{
//val = val;
}
Serial.println(val);
Serial.flush(); // clear serial port
}
//------------- END OF ARDUINO SKETCH -----------------

Canoscan lide 25 windows 10. We tried to access the Help menu for clarification, but clicking on it returned nothing.

  1. Visual Basic Serial Port Programming Video
  2. Visual Basic 6.0 Serial Port Programming
  3. Serial Port Programming In Visual Basic


PC's serial data acquisition interfaces require the sending and receiving of ASCII data to operate. To communicate with the serial port using Visual Basic, the MsComm control must be utilized to allow serial data transfer via a serial port ( Com1-Com4). MSComm is a custom control shipped with VB5.0 and VB6.0 and must be loaded using the Tools menu. Jun 08, 2015  When I try to read serial data from Arduino to Visual Basic I get nothing in the text field. It works fine with Arduino’s own serial monitor, but VB program sees nothin. I even copied your code exactly and it still doesn’t work. Other examples I found on internet don’t work either. I’m on VB 2013 Ultimate btw. Serial Port Programming With.NET: Serial ports provide an easy way to communicate between many types of hardware and your computer. They are relatively simple to use and are very common among peripherals and especially DIY projects.

Hello friends, hope you all are enjoying the start of winter season. By the way, I really hate winter season and I just want to hibernate in this season . 🙂 Well coming to our today’s lecture, my today tutorial, serial port in VB 2010, is actually based on a request made by one of the member on my Facebook Page and as it is a really good topic so i thought to share it.Today we will make a software on Microsoft Visual Basic 2010 in which we will send data through the serial port in VB 2010. In this software we will send the data and also receive it. Simply follow all the given steps carefully and you can easily interface the Serial Port in VB 2010, its a fully working project with code so don’t do any mistake.Moreover check these two complete tutorials on Microsoft Visual Studio 2010 as well, these are quite fascinating.
  • How To Send Email in Microsoft Visual Studio 2010
  • Creating a Database in Microsoft Visual Studio 2010
  • First of all download the Microsoft Visual Basic 2010. The installer can be freely downloaded from Microsoft. After installing the software follow these simple steps. So ,let’s get started with How to use Serial Port in VB 2010:

    How to use Serial Port in VB 2010 ???

    Step 1 : Creating a New Project
  • Open your installed Microsoft Visual Studio 2010 software. The first interface will be something like that :
  • Now click on the New Project and select Windows Form Applications.
  • In the project name box, add name of your project as I have added Serial Port Interface.
  • Click OK and a new window will be opened as shown in below image which contains a blank Form1.
  • In this Form1 we are gonna add our controls buttons etc.
  • Step 2 : Changing Name of Form
  • Now click on the form1 and the properties panel will be open on the right side. Now, in the properties tab shown on the right side change its name to frmMain (for easier identification specially when adding more forms).
  • Also change the text of the form to something you like as Serial Terminal. This will be shown on the title bar of your application.
  • Step 3 : Adding Controls To The Project
  • Lets start to add some controls in our software like buttons,combo box and labels etc.
  • Visual Basic Serial Port Programming
  • So from the Common Controls tab add two buttons, two combo boxes and two labels into your Form1 and align them as shown below :
  • For Button 1, change the text to Connect and change the name to btnConnect.
  • For Button 2, change the text to Disconnect and change the name to btnDisconnect.
  • For Combo Box 1, change the name to cmbPort.
  • For Combo Box 2, change the name to cmbBaud.
  • Visual Basic Serial Port Programming Video

  • For Label 1, change the text to Comm Port.
  • For Label 2, change the text to Baud Rate.
  • Keep the names and texts of same character as i wrote them.
  • They are case sensitive so be careful. I will recommend to just copy paste them.
  • If you make even a one letter mistake the code will not run.
  • btn and cmb are just to remind that they are button and combo box respectively. Its better to do neat programming.
  • Step 4 : Adding Serial Port & Boxes
  • Now from Container tab, add two Group Boxes in the forum.
  • Change the name of Group Box 1 to Transmit Data.
  • Change the name of Group Box 2 to Received Data.
  • Now add a Text Box and a Button in the Transmit Data Group Box.
  • Change the name of the Button to Send and text to btnSend.
  • Change the name of the Text Box to txtTransmit.
  • Now add a Rich Text Box in the Received Data Box and change its text to rtbReceived.
  • Arrange all these components as shown in the below image :
  • Lastly and i think its the most important part of this tutorial, add a Serial Port Block into your forum. It will appear at the bottom. Don’t change any of its parameters just leave it as it is.
  • Step 5 : Coding Section
  • Now we come to the coding part of our project. If you double click on your forum, it will open a new window something like that :
  • This is the place where we add our code and in other words add functionality to our project, this window is called Code Editor.
  • If you double click on any button or box, its respective code will created in this region automatically.
  • Now what you need to do is copy the below code and paste it in your code editor window.
  • Just remove all the previous code in your Code Editor Window.
  • Here’s the code for Serial Port in VB 2010:
  • After adding the code your Code Editor Window will look something like this one :

  • Step 6 : Compile Your Project
  • After adding all the code, now you are ready to compile your code and run your application.
  • To compile go to Debug -> Build SerialPortInterface and if everything’s going right then your project will pop up.
  • To test your application, just add some LCD to your serial port or simply short your Rx Tx pins and whatever you send you will receive it.
  • Here’s the image of my final application. I have converted it to .exe file, in my coming tutorials i will tell you how to convert a project to .exe file.
  • The project exe file and the complete code has already been emailed to all our subscribed members.
  • If someone didn’t get it or want to get these files then first Subscribe to Our Newsletter and then post your email here and I will email it to them.
  • So that was all on How to use Serial Port in VB 2010. I hope you guys have enjoyed it and are gonna design it on your own. Take care !!! 🙂


    JLCPCB – Prototype 10 PCBs for $2 (For Any Color)

    China’s Largest PCB Prototype Enterprise, 600,000+ Customers & 10,000+ Online Orders Daily
    How to Get PCB Cash Coupon from JLCPCB: https://bit.ly/2GMCH9w

    Visual Basic 6.0 Serial Port Programming

    Category: Microsoft Visual Studio 2010By Syed Zain Nasir90 Comments

    Serial Port Programming In Visual Basic

    Author: Syed Zain Nasir

    https://www.theengineeringprojects.com/I am Syed Zain Nasir, the founder of <a href=https://www.TheEngineeringProjects.com/>The Engineering Projects</a> (TEP). I am a programmer since 2009 before that I just search things, make small projects and now I am sharing my knowledge through this platform.I also work as a freelancer and did many projects related to programming and electrical circuitry. <a href=https://plus.google.com/+SyedZainNasir/>My Google Profile+</a>